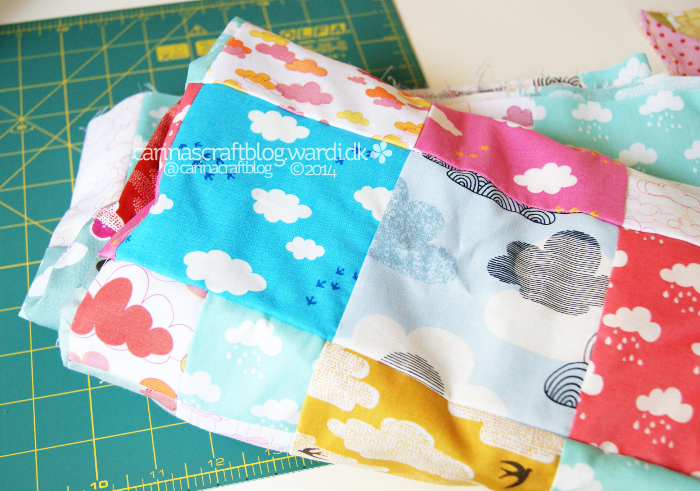
On my birthday I finished the Cloud Quilt top, woohoo! I’ve not taken any pictures of it yet. I might wait until I have made the back. Which should be a lot faster to make than the top. Maybe I’ll be all fancy and take pictures of the quilt slung over a tree branch or something. ;-)
I thought I’d share a bit about how I organised this quilt, because umm.. at first I was very not-at-all-organised about it. I knew I wanted to use 2½” and 4½” squares. At first I thought maybe I would do a 4-patch 9-patch design, but when I was sketching ideas for it, it just didn’t feel right.
Then I kept seeing quilt designs that used crosses and I really liked that idea. But I didn’t have enough of any of my cloud fabrics to make a ‘background’, so I needed to find a solution. I spent a couple of days sketching ideas and I ended up with this:
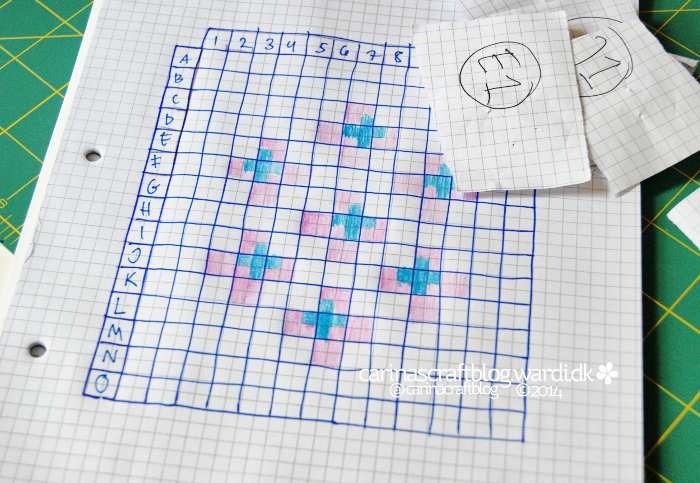
The ‘background’ of the top is made up of 4½” squares and then I made crosses from the 2½” squares. All the fabrics blend together and you might not even notice the crosses at first. To draw the eye to them a bit, I came up with the idea to make a mini cross inside each larger cross.
Other than this overall design, I did no have a plan when I set about laying out the top. On our bed. It took me a couple of hours to lay it out and move stuff around until I was happy with it.

Of course, I couldn’t leave it on our bed until I had sewn it together, so I had to figure out a solution to keep things together but also organised. I cut pieces of paper with the letter and number of the first/top square for each row, and pinned them to the corresponding fabric square. That way I would know which would be the starting square in each row as well.
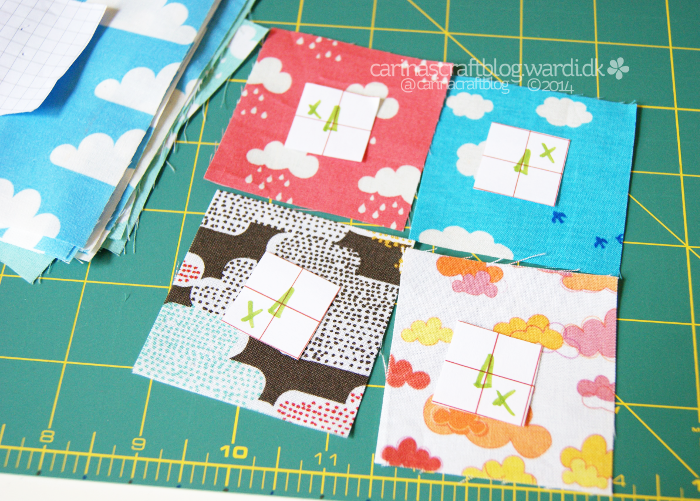
But the smaller squares that make up the crosses was a challenge in themselves. Because they had to be in a certain order to make up the smaller crosses, I couldn’t just rely on me remembering where each would go. So in the end I cut out these paper squares with four small squares. I then marked each with a arrow to show the right way up and then put an ‘x’ in the right corner. Then each little fabric square was placed in the stack with a paper square that mapped its position.
It was quite a lot of extra work, but it worked an absolute charm! It was so easy to keep track of each square within a square. I don’t think I’ve got a single square out of place! Huzzah! I doubt I could have said that if I had tried to do it as I went along. ;-)
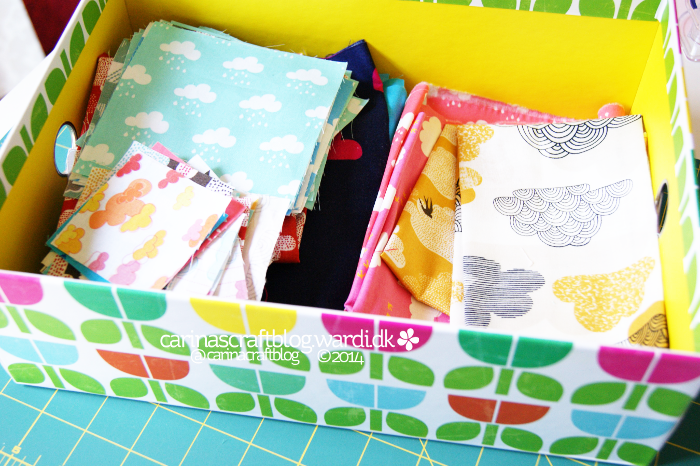
Oh and I do I get bonus quilter’s points for keeping all my cloud fabric and the plan etc all together in this box so I wouldn’t lose anything?! ;-)
And, wow, I just checked back – I started planning this quilt in October last year! I think good things are worth waiting for… :-)

