This is the second part of this little ‘Making of an embroidery pattern’ series. Last time I showed how I (sometimes, because it’s never exactly the same) create the design for the pattern. Today I want to show you how the stitching process works.
Once the pattern is ready, I transfer it to fabric. I always use the same white fabric, for two reasons: I think white is the best background colour to show the colours of the embroidery looking their most.. natural. And the other reason is to have a sort of uniform look to the patterns, although some of them are quite different from each other.

I will usually have a selection of colours in mind for a pattern, but they can easily change when I start stitching. For this pattern I wanted quite a lot of yellow and orange for the marigold flowers, but to make sure the whole pattern didn’t turn orange, I needed to balance that. So Frida’s top is a darkish blue and she has jewellery in jade colours. And of course there are green leaves.
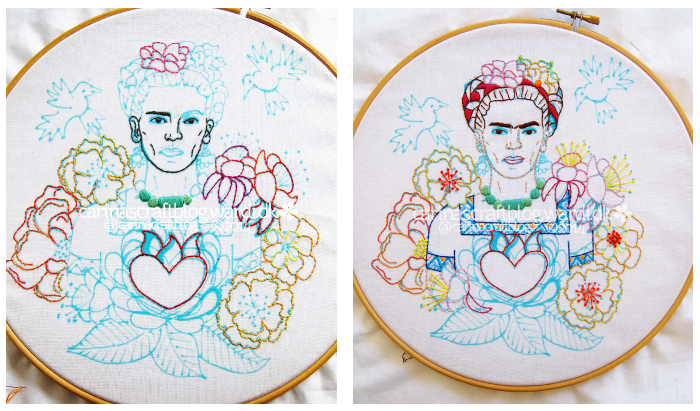
I started by stitching part of her face, then some of the flowers and other elements. I don’t necessarily finish one section before I move onto another. It’s more about which colours need to go where.
The colours on the flowers on the top right in the second image were the wrong colours, they were much too dark next to her face. And you can also see that I made a big change with her facial features. Although I really liked the look of the dark grey I used at first, it didn’t feel right for this – after all, humans are not grey. ;-)

The heart was too large and I had re-drawn the elements of it several times so it was a big mess. This made it difficult to see where I actually wanted to stitch, so I finished as much as I could and then I rinsed off the transfer lines. It’s always exciting when the transfer comes off, it’s a bit like seeing a photo develop. You can’t see the embroidery properly until you remove the transfer lines.
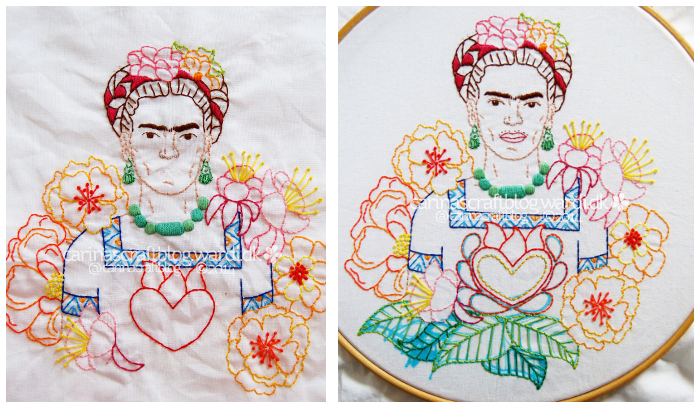
In that third image I had still to stitch the mouth. Or rather, I had still to stitch it to look just so. I don’t think I’m exaggerating when I say I had stitched the mouth 10+ times at this point. So I decided to leave it before it drove me completely crazy. ;-) You can actually see the ‘imprint’ of the mouth stitching even after I rinsed the fabric.
I decided not to stitch the birds. I like them a lot, but I think they would have felt a bit like clutter. Especially being so close to her face. This sort of thing happens quite a lot. Something is included in my original design/sketch, but when it comes to stitching it, it turns out it doesn’t work after all.
This is something I’ve had to learn. That it’s ok not to include All The Things. Just because something is in the design, doesn’t mean it will work. Which of course is one very important reason I always stitch the patterns I put for sale. I want to make sure they are… stitchable and not just any old drawing.
If sections in a design are too close together when stitching, I want to be the one who finds out first and not let my customers become frustrated with my patterns. It is on me to make sure the patterns are as good as possible. :-)
The fourth image is the finished embroidery, before rinsing out my drawings of the leaves and the heart.
I managed to finish the mouth, although it’s not 100% how I want it to be.. it doesn’t look quite like Frida’s mouth, but it will have to do. I have really enjoyed working on this pattern and it would be silly to let one detail take away from that. There was one moment where I felt like throwing the embroidery on the floor in frustration. But that’s not really a good solution!
I really wanted it to look as much like Frida as possible, but I think there’s also a point where you have to step back and not let perfect get in the way of good.
So that’s how I (sometimes!) go about stitching a pattern. :-)
