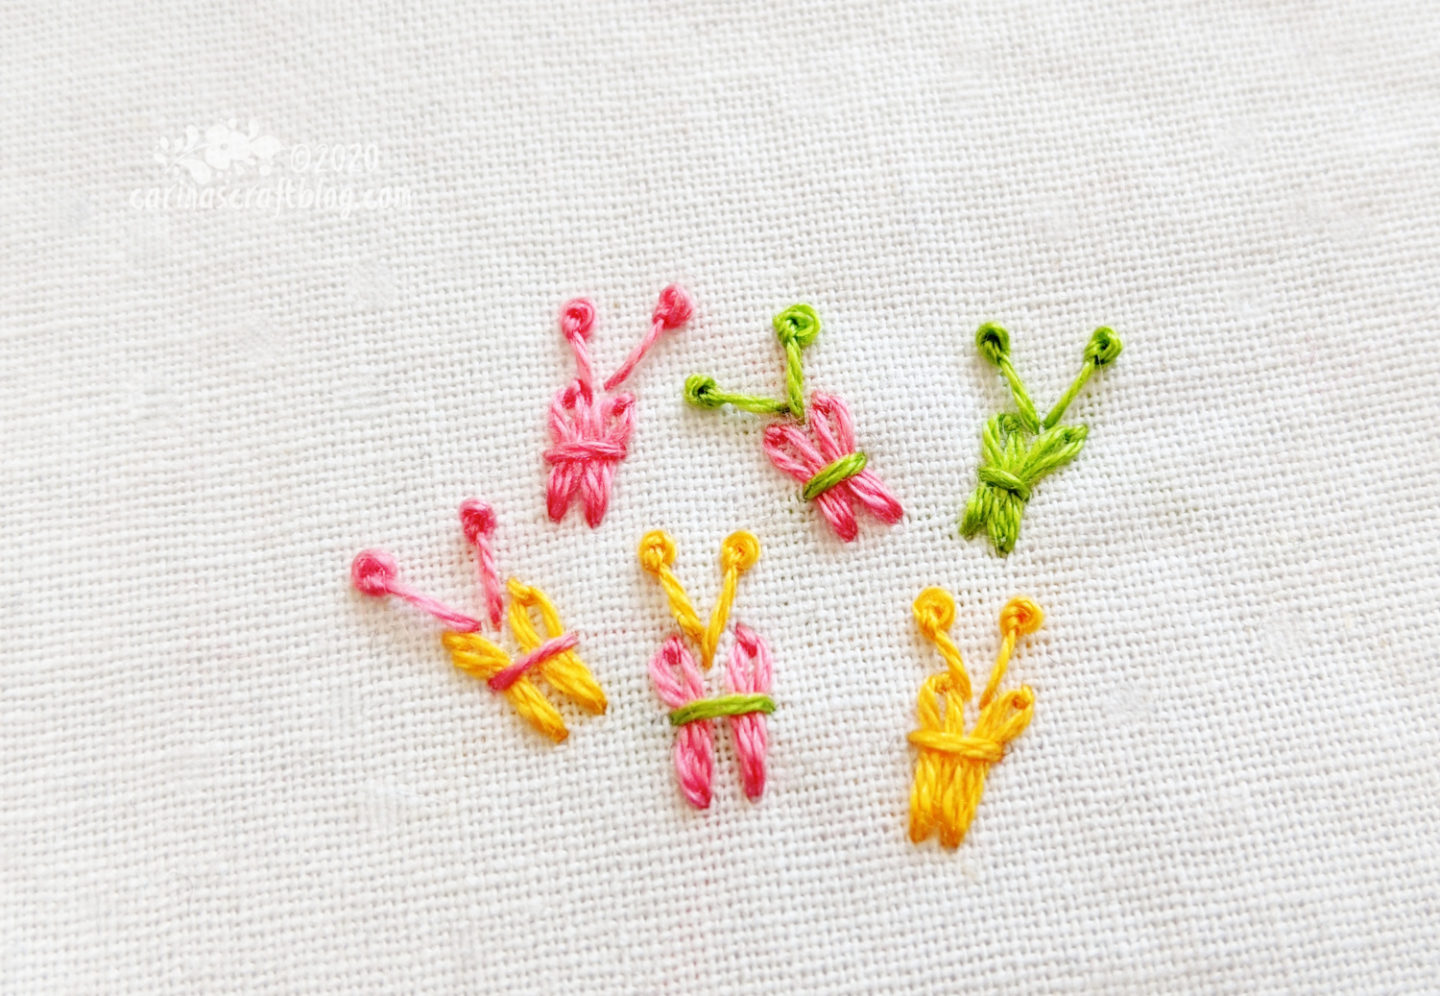
This is a stitch, or I guess a stitch combination, I used in my next book (pre-order a signed copy of Thread Doodling) and I also used it in my March Dot sampler. I have tried Googling ‘butterfly embroidery stitch’ but no results look like these guys, so I dunno…have I invented an embroidery (combo) stitch?! :-D
Whether I have or not, I thought I’d share a tutorial for them. They’re so cute! :-)
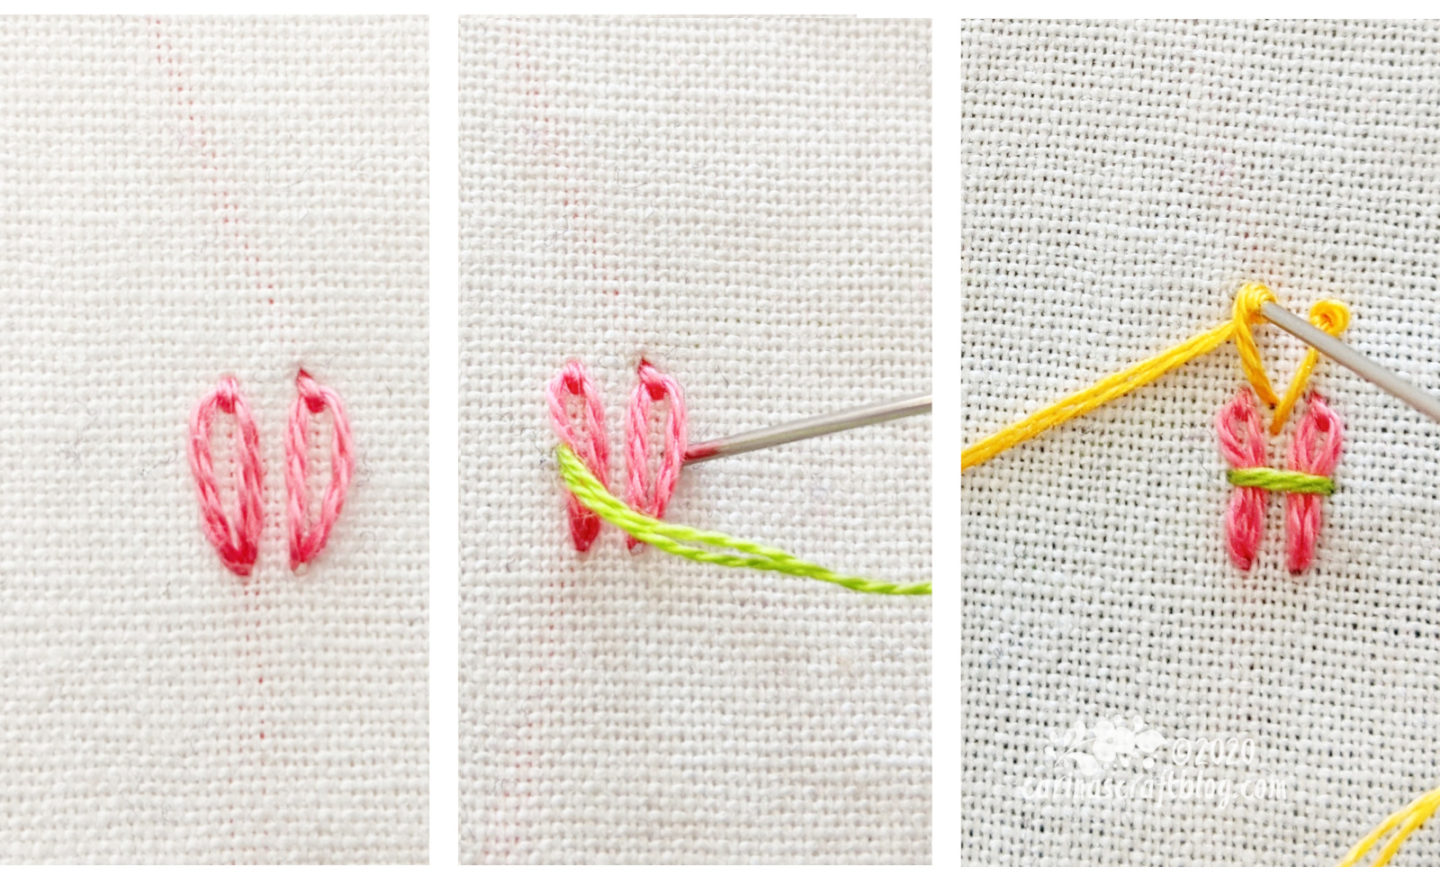
* First make two lazy daisy stitches about a millimeter apart.
* Next, bring the needle up halfway along the side of one lazy daisy stitch and push it down opposite under the other lazy daisy stitch, cinching the two together.
* Finally, at the top of the butterfly, make two pistil stitches for the antennae.
Easy-peasy! :-)
– – – – – – – – – – – – – – – –
Find this tutorial useful?

This is fantastic and so timely! I just picked up my embroidery again after a long break; it’s a voided monogram with a flower-garden like fill and I needed something new! The butterflies will be a fantastic addition!!!! Thank you so much for sharing!
Author
My pleasure! Happy stitching! :-)